Running the Red Hand of Doom in Starfinder: Part 3
Section 1: Vraath Keep
“Looming out of the shadowy woods ahead is a haunting sight—a
ruined keep. The old castle sits on a small rocky hillock, and you can
catch glimpses of a broken tower between the trees. A moss-covered
stone at the side of the road you’re following marks a footpath that
looks like it leads up to the keep.” (the Red Hand of Doom, p.30)
Welcome back friends & adventurers. Today we’ll be looking at Vraath Keep & Skull Gorge, possibly the two greatest and most fun encounters in the entire adventure. Vraath keep is no joke, when I ran this part of the story for my players there was almost a TPK during the fight with Wyrmlord Koth. The fight was a little more difficult than the one described in the in the book because I had Zaar the Doom Hand cleric in the room with Wyrmlord Koth. He had fled to Vraath Keep after the marauder attack & attempted to shift the blame of losing the cargo to Uth-Lar, the slain hobgoblin leader.

side have partially collapsed, and several large boulders lie strewn
about. The decayed remains of two sets of large wooden gates lie in a
heap on the ground.
At this point in the adventures the PCs should be either level 2 or 3. Personally, I would aim for them to level up to 3 following the fight with the hydra/flayer leech. That way you can buff up the Vraath Keep encounters a little bit. This section is meant to be a challenge, so don’t be afraid to buff up the encounters a little bit. It’s going to be one long gauntlet from here to Skull Gorge, so let’s get started.
#2 on the map above is the gardener’s shack. It’s old and decrepit, any PC who stands inside the shack or touches it in any way causes the shack to make a DC 8 fortitude save (no modifiers, just a straight d20 roll). If the shack fails the roll, it collapses dealing 2d6 bludgeoning & piercing damage (Reflex 15 for half) and immediately alerts the goblin guards. The shed’s break DC increases by 2 for each additional creature attempting to stand inside.
#1 on the map is the ruined gatehouse. The module states that there really isn’t much here for the PCs to fund, but I decided to have 3 space goblin zaperators & a space goblin honchohead lazily “guarding” the gate. One was sleeping & the others were engaged in some sort of game that involved throwing rocks at things. You can find their stats here. https://www.starjammersrd.com/game-mastering/bestiary/enemies-by-type/humanoids/space-goblin/space-goblin-zaperator/ https://www.starjammersrd.com/game-mastering/bestiary/enemies-by-type/humanoids/space-goblin/space-goblin-honchohead/ If the PCs are stealthy, they can dispatch the goblins relatively easily. However, if the goblins see the PCs one goblin will run to the worg stables for reinforcements.
#6 on the map is the worg stables. Two more space goblin zaperators tend to the “worgs” here. If you don’t want a particularly challenging encounter, you can use the modified Akatas from the marauder attack. Another option is to scrap the “worg stables” idea completely. When I ran this encounter, I changed this area to an assembly ooze storage unit. The goblins here are tasked with “feeding” prisoners & useless materials to the assembly oozes, which then produce useful resources like armor & weapons. This is a good spot for PCs to upgrade their equipment as well. If they looted all of the goblins/hobgoblins so far they should have enough spare armor & weapons to craft at least a few upgrades. The way I ran it, the oozes won’t attack the PCs unless the PCs attack them first.

Next we have #7 on the map, the spike littered nest. My PCs actually completely bypassed this encounter, but I’ll go over it just in case yours feel like picking a fight with a manticore/whatever you substitute for a manticore. The book states that the manticore doesn’t engage in combat unless attacked & if it sees the PCs it assumes they’re part of Koth’s army, so unless your PCs are really jonsing for a fight, this one’s easy to skip. Personally, I would replace the manticore with a Patrol Class Security Robot from the Alien Archive 1 p.94. The robot would keep asking them to present identification (which they could get from any slain goblins/hobgoblins) and if they didn’t have any, the robot would just keep repeating “report to Commander Koth for new identification and flogging.” It’s not exactly a top of the line security robot. You can find it’s stats here: https://www.starjammersrd.com/game-mastering/bestiary/enemies-by-type/constructs/robots/patrol-class-security-robot/ As for the treasure in this room, I used this handy-dandy loot generator. https://sfrpgtools.com/loot-generator
Next on the map, we have #8, the barracks. This is where the PCs will face Karkilan the minotaur & 4 hobgoblin troopers. I used a Nuar Enforcer for the minotaur & you can find their stats here: https://www.starjammersrd.com/game-mastering/bestiary/enemies-by-type/monstrous-humanoids/nuar/nuar-enforcer/ https://www.starjammersrd.com/game-mastering/bestiary/enemies-by-type/humanoids/hobgoblin/hobgoblin-trooper/
It should be noted that the hobgoblins here are resting & thus are not wearing their armor. If caught by surprise it will take them a round to spring up & grab their weapons. They would have been wearing Lashunti Ringwear I, so their AC should be adjusted accordingly. Technically, the hobgoblins should have an AC of EAC 14 KAC 16 (+2 from dexterity, +2 to EAC from armor & +4 to KAC from armor with an additional +1 against combat maneuvers). But, according to the stat block, their AC is only EAC 11 KAC 13. Hobgoblins have a +4 to Dexterity, so technically their unarmored AC would be EAC 14 KAC 14. I would say use whichever ACs you think are appropriate for the situation. If I had it to do over again I might just use the hobgoblin trooper stat block as is & just say they sleep in their armor. Side note: I would use the Starfinder Loot Generator to add some treasure to this room, as well.
Finally we get to #9, the war room, where the PCs will finally encounter Wyrmlord Koth. I would highly recommend reading up on this section, which is located on p.34 of the Red Hand of Doom. The PCs can get a LOOOOOOOOT of information here & you can play Koth in a number of ways, so I’ll leave that to your imagination.
It should be noted that if the PCs did not defeat Karkilan the minotaur or stop him from warning Koth, the minotaur will also be here. When I ran this for my PCs, they took out Karkilan, so this wasn’t an issue, but if your PCs don’t, they could be in for a rough time.
So, for this encounter, we have Wyrmlord Koth, who’s stats are as follows:
Wyrmlord Koth CR 2
XP 600
Hobgoblin technomancer
N Small humanoid (hobgoblin)
Init +2; Perception +7
DEFENSE HP 21
EAC 14; KAC 15
Fort +1; Ref +1; Will +5
OFFENSE
Speed 30 ft., climb 15 ft.
Melee survival knife +4 (1d4+1 S)
Ranged tactical semi-auto pistol +6 (1d6+2 P)
Technomancer Spells Known (CL 2nd; melee +4, ranged +6)
1st (3/day)—detect tech, jolting surge
0 (at will)—detect magic, energy ray
STATISTICS
Str –1; Dex +2; Con +0; Int +4; Wis +1; Cha +1
Skills Computers +12, Engineering +12, Sense Motive +7
Feats Spell Penetration
Languages Goblin, Common
Other Abilities spell cache (wrist computer)
Gear freebooter armor I, survival knife, tactical semi-auto
pistol with 30 small arm rounds
You might ask “why is Wyrmlord Koth only a CR 2 technomancer? Well, the answer to that is that the real boss of this encounter is Zaar, the Doom Hand cleric. The way I ran it, Zaar had ambitions to usurp control from Koth & become a wyrmlord himself. His only challenge was the relationship between Koth & the green dragon Ozzyrandion. Koth is not particularly powerful himself, but he has powerful friends. Here is Zaar’s stat block:
Zaar CR 5
XP 1,600
Male hobgoblin mystic
CE Medium humanoid (hobgoblin)
Init +1; Perception +11
DEFENSE HP 55
EAC 17; KAC 18
Fort +6; Ref +4; Will +8
Resistances cold 5, fire 5
OFFENSE
Speed 30 ft.
Melee survival knife +8 (1d4+7 S)
Ranged liquidator disintegrator pistol +10 (1d10+5 A)
Offensive Abilities blood mark (see page 50), destructive
frenzy (see page 50)
Mystic Spell-Like Abilities (CL 5th)
At will—mindlink
Mystic Spells Known (CL 5th; ranged +10)
2nd (3/day)—caustic conversion, command undead
(DC 17), hurl forcedisk
1st (6/day)—carnivorous (see page 51), mind thrust
(DC 16), reflecting armor (DC 16)
0 (at will)—fatigue (DC 15), telekinetic projectile
Connection devastator (see page 50)
STATISTICS
Str +2; Dex +1; Con +3; Int +0; Wis +5; Cha +2
Skills Intimidate +16, Mysticism +16, Sense Motive +11
Languages Abyssal, Common, Goblin, Elven; limited
telepathy 60 ft.
Gear d-suit I (mk 1 thermal capacitor), liquidator disintegrator
pistol with 3 batteries (20 charges each),
survival knife, personal comm
unit, field rations (2 weeks), R2Es (5)
So now that the PCs have defeated Koth and cleared out Vraath keep, they now have access to a trove of information from Koth’s office. Here they’ll find troop numbers, the names of the other wyrmlords, battle plans, information about Azar Kul and much, much more. Personally, I think the goblin map they find is just about the greatest handout I’ve ever seen.

So, that’s it for Vraath Keep. Next time, the PCs will have to travel to Skull Gorge bridge & attempt to destroy it before the Doom Hand army can cross. They’ll meet giants, find artifacts of immense power and probably fight a dragon.
Until next time, friends: ABC (Always Be Converting)
The Red Hand of Doom in Starfinder Part 2
Running a sci-fi adventure in a medieval theme. If you’re planning on updating the Red Hand of Doom, or any old D&D module, for use in Starfinder, there are a few points to take into consideration. The Red Hand of Doom is meant to be played in a medieval setting. People have swords, not lazer guns, there aren’t any space ships or flying vehicles and a big part of this adventure deals with overland travel. The PCs will need to find horses or other means of quick transportation if they’re going to stop the Doom Hand army in time. One thing I loved about the Red Hand of Doom is the fact that the PCs are on a timer. They can’t spend days or weeks crafting or going off on sidequests, they need to be focused and on their A game if they’re going to get things done in time.
So, it’s pretty clear that jetpacks & spaceships would make it far too easy for the PCs to get around, at least initially. So, this is what I did. I had the PCs start off as porters working for a small-time smuggler/freighter captain named Old Tom. They were supposed to deliver some cargo to a specific point on the planet, collect their pay and leave. However, once they got there they found that the buyers were hobgoblins from Azar Kul’s army & the crates were filled with weapons & armor. Old Tom decided he would rather keep all of the payment for himself & flew away in his ship, leaving the PCs at the mercy of the hobgoblins & instigating encounter #1 which we talked about in part one of this series.
So, now the PCs are marooned on a backwoods planet with no way home. Eventually they make it to Drellin’s Ferry only to find that no one there has a ship either. In fact, a wealthy lord from a northern country came through last year offering to buy any ships at more than double their market value. Most people took him up on the offer, so the chances of finding someone with a space ship in the Elsir Vale is fairly remote.
But, the PCs know that the Doom Hand soldiers that attacked them on the road were using off-world weapons & armor. So, if anyone has a ship, it’s probably the hobgoblins.
Once in Drellin’s Ferry, the PCs meet Captain Sorrana and a whole host of colorful characters that can be a ton of fun to play out. Personally, I played Jorr the woodsman as a loud, half-crazy character who was always insulting the party while taking giant swigs of his homebrew moonshine out of a jug he always carried around. But, despite being half-dunk, he was able to lead the PCs through the woods & up to Vraath Keep in search of the hobgoblins. The PCs left all of the armor & weapon crates with Captain Sorrana & the town guard so that they could better defend themselves against more attacks.

This is a good point to throw in some random encounters. The PCs are going to need all the help they can get in the near future. There’s a random encounter table on p.28 of the Red Hand of Doom & using that to determine what kinds of monsters you think should be in the area can be a big help. Personally, I had some Draeliks ambush the party. The Draeliks were servants of the first Dragon the PCs will face, but more on that later.
Encounter #2: The Causeway

For this encounter, the party is supposed to face a six-headed hydra. I chose to replace the hydra with a Flayer Leech. It’s stats can be found here https://www.starjammersrd.com/game-mastering/bestiary/enemies-by-type/vermin/flayer-leech/
Remember, the PCs are only level 2 at this point, so the CR 3 Flayer Leech cound cause some problems.
But, I think that’s where I’ll leave off today. When we come back next time we’ll talk a little more about Vraath keep and Skull Gorge.
Cheers, friends & ACB (Always Be Converting)
Running the Red Hand of Doom in Starfinder
I remember hearing about the Red Hand of Doom back in the early 2000s and even back then everybody was raving about it. Back in 2015 Escapist Magazine rated it number 5 on their “8 Awesome D&D Modules” list. Almost every top X best modules list since the early 2000s includes the Red Hand of Doom. So, I decided that I had to find out for myself. The only problem was that my group didn’t generally play 3.5 anymore, we overwhelmingly play Starfinder. The two systems share a lot of similarities, so I figured I would just convert the module.

Section 1: The PDF
I do own a physical copy of the Red Hand of Doom, however, I normally work in Asia & I don’t usually pack my RPG collection around with me. So, I got the Red Hand of Doom PDF from DriveThruRPG.com. As of 7/10/2020 you can get an amazing full-color PDF from DriveThruRPG.com for $9.99. In my personal opinion, that’s a steal.

The thing I loved most about this PDF were the maps. I ran the Red Hand of Doom using the virtual tabletop Roll20, so it was a big help to have such high quality maps. Just take a look at this map for the first encounter.

The entire PDF is filled with great maps. It has every encounter, all of the dungeons, the world map, each town & city, and quite a bit more. Honestly it’s almost worth picking up the PDF just for the maps alone.
But what about organization? When I run modules I sometimes encounter issues like key information not being clearly conveyed or things being indexed in counter-intuitive ways. I can honestly say that I had no such issues when running the Red Hand of Doom. Even if you didn’t read the entire module beforehand, it would be super easy for a GM to just read a small section, get the key details for that section, set up the encounters, and voila, you’ve got yourself an action-packed session of D&D or Starfinder or whatever. If only every module were organized like the Red Hand of Doom. Another ting I really appreciated were the NPC stat blocks being included with the encounters. I didn’t have to waste time looking at the encounter page, then flipping to the back for the stat blocks & back again. In my case I wasn’t even using the stat blocks since I was substituting 3rd edition monsters for Starfinder monsters.
So without further ado, let’s look at what the first encounter would look like if we ran it in Starfinder.
Section 2: The Encounters
The great thing about converting these modules is that you can set them at any level you want. I started my group out at level 1 & they did a little mini-adventure that got them to the planet (this is Starfinder after all) so by the time they started the Red Hand of Doom they were level 2. The encounter setup looks a little like this.

So for this encounter we need 6 hobgoblin regulars, two hellhounds, a hobgoblin cleric & a hobgoblin warrior-leader. We also need to have 6 more hobgoblin regulars for the second wave just in case the PCs have an easy time with the first wave. So, here are the stats we’ll use for the encounter:
Hobgoblin Regulars: Hobgoblin Troopers from p.76 of the Alien Archive 2.

Their stats are as follows:
HOBGOBLIN TROOPER CR 1
XP 400
LE Medium humanoid (goblinoid)
Init +4; Senses darkvision 60 ft.; Perception +5
DEFENSE HP 20
EAC 11; KAC 13; +1 vs. combat maneuvers
Fort +3; Ref +5; Will +1
Defensive Abilities battle hardened
OFFENSE
Speed 30 ft. (25 ft. in armor)
Melee standard taclash +5 (1d4+3 S nonlethal)
Ranged azimuth laser rifle +8 (1d8+1 F; critical burn 1d6) or
stickybomb grenade I +8 (explode [10ft., entangled 2d4
rounds, DC 10])
Space 5 ft.; Reach 5 ft. (10 ft. with standard taclash)
STATISTICS
Str +2; Dex +4; Con +1; Int +0; Wis +0; Cha +1
Skills Athletics +5, Intimidate +5, Stealth +10
Languages Common, Goblin
Gear lashunta ringwear I, azimuth laser rifle with
2 batteries (20 charges each), standard taclash,
stickybomb grenades I (2)
ECOLOGY
Environment any
Organization solitary, pair, advance unit (3–6 plus 1 kanabo
commando [see page 88]), squad (3–12), warband (4–16
plus 1 hobgoblin lieutenant)
SPECIAL ABILITIES
Battle Hardened (Ex) Hobgoblins are trained for combat
from an early age, and they quickly learn that a foe can
do much more than just hurt you. Hobgoblins gain a +1
racial bonus to AC against combat maneuvers.
You can also find their stats on the Starjammer SRD. https://www.starjammersrd.com/races/other-races/hobgoblin/
For the hellhounds, we’re going to use the stat block for the Akata, but otherwise treat them like hellhounds or regular hounds.
AKATA CR 1
XP 400
N Medium aberration
Init +6; Senses blindsense (life) 10 ft., blindsense (scent)
60 ft., darkvision 120 ft.; Perception +5
DEFENSE HP 18
EAC 12; KAC 13
Fort +3; Ref +3; Will +3
OFFENSE
Speed 40 ft., climb 20 ft.
Melee bite +8 (1d6+2 P )
STATISTICS
Str +1; Dex +2; Con +4; Int –4; Wis +1; Cha +0
Skills Acrobatics +5, Athletics +5 (+13 to climb), Stealth +10
So, basically we just removed the Akata’s special abilities & immunities. Now they’re just regular hounds.
For the warrior/leader we’re going to use the gang pusher from p.178 of Pact Worlds.
GANG PUSHER CR 2
XP 600
Hobgoblin operative
NE medium humanoid (hobgoblin)
Init +9; Senses darkvision 60 ft.; Perception +13
DEFENSE HP 23
EAC 13; KAC 14
Fort +1; Ref +4; Will +5
Defensive Abilities evasion
OFFENSE
Speed 30 ft.
Melee tactical baton +8 (1d4 B)
Ranged static arc pistol +8 (1d6 E plus stun; critical arc 2)
Offensive Abilities trick attack +1d8
STATISTICS
Str +0; Dex +4; Con +0; Int +1; Wis +1; Cha +2
Skills Acrobatics +8, Bluff +13, Culture +8, Engineering +13,
Intimidate +13, Sleight of Hand +13, Stealth +13, Survival +8
Feats Veiled Threat
Languages Common, hobgoblin, up to 2 others
Other Abilities, operative exploit
(uncanny mobility), specialization (thief)
Gear freebooter armor I, static arc pistol with 1 battery (20
charges), tactical baton
Finally, for Zarr the Doom Hand cleric, we’ll be using the Tahomen stat block from Temple of the Twelve (Dead Suns 2). Now, Tahomen is a CR 5, so when I ran this adventure I had Zaar stay back & buff the other hobgoblins. He didn’t directly engage in the fight, but he did taunt the players & make a lot of threats. However, when the PCs start getting the upper hand Zaar flees the scent. The PCs can catch up with him later at Vraath Keep. When I ran this encounter, I had him try to kill a friend of the PCs & just generally be a real a-hole so that the PCs would want to go after him. I also had him allude to the destruction of Drellin’s Ferry & foreshadow some future events.
Zaar CR 5
XP 1,600
Male hobgoblin mystic
CE Medium humanoid (hobgoblin)
Init +1; Perception +11
DEFENSE HP 55
EAC 17; KAC 18
Fort +6; Ref +4; Will +8
Resistances cold 5, fire 5
OFFENSE
Speed 30 ft.
Melee survival knife +8 (1d4+7 S)
Ranged liquidator disintegrator pistol +10 (1d10+5 A)
Offensive Abilities blood mark (see page 50), destructive
frenzy (see page 50)
Lashunta Spell-Like Abilities (CL 5th)
1/day—detect thoughts (DC 16)
At will—daze (DC 15), psychokinetic hand
Mystic Spell-Like Abilities (CL 5th)
At will—mindlink
Mystic Spells Known (CL 5th; ranged +10)
2nd (3/day)—caustic conversion, command undead
(DC 17), hurl forcedisk
1st (6/day)—carnivorous (see page 51), mind thrust
(DC 16), reflecting armor (DC 16)
0 (at will)—fatigue (DC 15), telekinetic projectile
Connection devastator (see page 50)
STATISTICS
Str +2; Dex +1; Con +3; Int +0; Wis +5; Cha +2
Skills Intimidate +16, Mysticism +16, Sense Motive +11
Languages Abyssal, Common, Castrovelian, Elven; limited
telepathy 60 ft.
Gear d-suit I (mk 1 thermal capacitor), liquidator disintegrator
pistol (see page 52) with 3 batteries (20 charges each),
survival knife, psychic booster, detonator, personal comm
unit, field rations (2 weeks), R2Es (5)
Obviously, the PCs aren’t going to fight Zaar here, he’s much too strong. They’ll have to get a few levels under their belt before they can stand a chance.
So, that’s basically how I ran the first encounter in the Red Hand of Doom. All you really need to do is find out what CR you’d like the encounter to be and just replace the enemies with Starfinder monsters. Next time we’ll talk a little more about how I got around some of the big issues with running Starfinder in a medieval setting, like access to space ships & jet packs.
But until then, cheers and ABC (Always Be Converting)
Converting Old Adventures to New Systems
In 2014-2015 I decided to update the old 2nd edition I6 Ravenloft adventure for use with the Pathfinder (1e) ruleset. Since then, converting old modules & adventures has kind of become my thing.
A few years ago I ran the Red Hand of Doom using Starfinder, which turned out to be amazing. After that, I ran I6 Ravenloft in Starfinder which, again, turned out to be fantastic. Over the past few months, a friend of mine from the Renerdgitated podcast https://www.facebook.com/Renerdgitated/ has been updating an old module to Starfinder as well. You’ll be able to listen to it on the podcast in the near future. Currently, I’m working on converting an old D20 Star Wars adventure into the Edge of the Empire ruleset, which is turning out to be a very interesting process.
So, the question arises; why do we do it? Why do we go to all the trouble of converting these old modules to new systems when there are plenty of modules already available that are specifically designed for those systems? Why run Ravenloft in Starfinder when you could run Attack of the Swarm? (You should absolutely run Attack of the Swarm, it’s amazing).
To answer that question, I’m going to have to touch on a somewhat controversial subject (though far less controversial now than it used to be), and that subject is 4th edition D&D.

Personally, I never got into 4th Edition. Time has been much kinder to it than I initially was and in many ways I’ve heard it’s a fantastic game. But, Wizards did something with 4th edition that many 3.5 players found unforgivable at the time. They made numerous statements that the 4th edition product line would be compatible with the 3.5 ruleset.
It was not.
So, if you were like me, you spent nearly a decade and a copious amount of money on 3rd & 3.5 products only to find out that they were now completely obsolete and would no longer be supported. It was around this time that many 3.5 players switched to Pathfinder, which offered a cleaned up version of the 3.5 rules that could be easily incorporated into the current 3.5 library.
So, we find ourselves at a fork in the road. We have Pathfinder; a system that lets us easily convert our old modules, and we have 4E, the officially licensed Wizards product line that has a lot of interesting things in it, but is not compatible with 3.5 or pathfinder. This is where several of my friends started their conversion careers, converting 4e material to Pathfinder & 3.5.
So, now we have a pretty strong reason for wanting to convert modules in the first place. There are a lot of systems out there & a lot of modules. What happens when you find a module you like that’s integrated into a rules system you don’t?
You convert it!

However, as many people have pointed out over the years, perhaps “conversion” isn’t exactly the right word. We’re not so much “converting” a -3 THACO modifier to a +3 to hit modifier or an advantage roll or a dice upgrade (if you’re playing FFG Star Wars).
No, what we’re really doing is taking a story that we like and running it in a rules system it wasn’t designed for, and that takes some elbow grease on the part of the GM.
So, that’s why I’m starting this little project. I’ll be documenting my conversion shenanigans here and attempting to organize them as efficiently as possible. Why? So that if you want to run the same old adventures in the same new systems, maybe the resources available here will make running those games a little bit easier.
Cheers, and ABC (Always Be Converting).
CALL-Based Research Review
For this review, I wanted to go a little more in-depth into an article I referenced briefly at the end of my CALL lesson review. In this article: “Effects of CALL-mediated TBLT on motivation for L2 reading” the authors bring up Task Based Learning, how CALL has become incorporated with TBLT, and some of the issues that have arisen over the years.
In the section “A statement of the problem” the authors go into detail regarding why CALL and TBLT haven’t been embraced by everyone. Many parents, especially in some countries where English is not the first language, subscribe to traditional models of education. The teacher is the source of all knowledge & the students are there to absorb information from this source. When we prompt students to respond, we are asking for their input. If we are the purveyors of all knowledge, why should we ask for the input of our students? Why not just explain to them the correct and traditionally acceptable answers? This is the paradigm that many educators practicing TBLT & CALL have butted heads with in recent years.
Often, when we use CALL in the classroom, we’re using it to elicit something from our students. In the example lesson from my last CALL-based lesson review, the teacher wanted the students to listen to a podcast and then use the information from it to answer questions about what they heard. In the eyes of many parents, this would not be an acceptable use of time. Students can answer on the exam, they don’t need to speak or participate in class. They should be taking notes and listening, not speaking.
Obviously, this paradigm is counter intuitive to what most ESL instructors would consider to be a quality lesson. It’s rare to meet a TEFL/TESOL teacher who just stands in front of the class and lectures. Most of us prefer task-based activities, or at least a little bit of Q&A.
So, the authors here decided to conduct a study on task-based learn via the medium of computer assisted language learning. A few of the participants from the study state:
“Beauvois (1994) and Beauvois and Eledge (1996) reported remarkably positive attitudes by intermediate French learners who perceived linguistic, affective, and interpersonal benefits from their experiences using computer-assisted classroom discussion.”
“According to Stepp-Greany (2002), web-learning offers well-selected activities and interactive learning. He also reports that technologically equipped classrooms raise students’ motivation due to the interactive nature of the activities.”
From my own personal experience, I can definitively state that I’ve preferred the online discussions I’ve had in graduate-level TESOL classes to most of the undergraduate-level discussions I participated in while I was getting a B.A. Is it because the class sizes in my M.A. program are smaller? Is it because of the professors? Is it because I have the ability to go back and re-watch sections of the lecture/discussion if I need to? I think that would be a great option to have if I was learning an L2.
So, at the end of the day Tavakoli, Reza Lotfi and Reza Biria completed a study into students’ motivation in scenarios where CALL and TBLT are prevalent. Did they come up with definitive, undeniable proof that CALL-based learning is “better” than traditional education? Probably not, but I think they made some very good points, and I’m glad someone looked into how we use CALL and why some people might take issue with it.
I’ve already gone on a little too long, but I’ll link the article at the end of the review in case you would like to read further. All of the quotes from this review come directly from the article posted here: https://www.cogentoa.com/article/10.1080/2331186X.2019.1580916.pdf
CALL-Based Lesson Review
(Disclaimer: This has nothing to do with tabletop gaming. However, I have found in my years of GMing that GMing and teaching share essentially the same skill set. You have to know your players/students and be able to craft a game/lesson around them. In this case we also need to know how to use technology to provide the best game/lesson we can. So, with that, I give you my brief review of a CALL-Based Lesson Plan)
A Brief Review of a CALL-Based Lesson Plan
For many of us in the ESL/ELL/TEFL/TESOL field, CALL or computer-assisted language learning has become the norm. It’s how we do things. It’s integrated into the very fabric of our processes. Even if we don’t use any technology in the classroom, we almost certainly use a word-processing program to type up our lesson plans. We do Google searches to find resources, ideas or any number of things to use in our classrooms. Some of us have moved to teaching online and thus have become even more reliant on CALL in our day-to-day lives.
So, if we’re going to use CALL so extensively, I think we should at least make it as interesting & relevant as possible. That’s why I want to talk about integrating podcasts into your ESL classroom. There are a million podcasts out there and they range from amateur to professional in quality. Chances are you can find a podcast to cover any topic you’re thinking of discussing. Most people are at least familiar with the concept of a podcast even if they haven’t listened to one, themselves.
With that in mind, I’ve decided to take a look at a lesson written by an ESL teacher named Jason White for TEFL.net https://www.tefl.net/elt/ideas/listen/podcasts/
In this lesson, Jason identifies words that his students probably don’t know, gives them time to look up the words in a dictionary, asks a few warm-up questions, listens to the podcast with the students and then finally goes over the worksheet answers before finishing up with a discussion about how things went.
- Strengths & Weaknesses of the Activity
If we scroll down to the section “Using a Worksheet” we see the entire lesson outlined for us. As I mentioned above, students are initially given an opportunity to learn new vocabulary via looking up words they may not know. I like how the teacher gave students the option to work in small groups or independently. In my experience, a classroom is often filled with different kinds of learners & it’s always a good idea to put options on the table.
For the next section “Warm Up” the teacher asks the students several questions related to the article. Personally, I would have moved this section to the end of the lesson, or at least until after they had listened to the podcast. I understand wanting to get the ball rolling, but judging by the answers at the end of the lesson, I think the students would have done better if they’d been able to listen first & get some context into the topic of discussion.
Next, students actually listen to the podcast & answer questions. Jason White writes:
“For this podcast, I made them multiple choice. There were 9 questions, so that worked out to about one question every 23 seconds. You do not want to rush too many questions too close together.” (White, 2007)
I definitely agree that a teacher shouldn’t overload the students with copious amounts of work. However, I think that in this case a better option would have been to listen to the podcast once without attempting to answer the questions, then going back and listening to it again while filling in the answers.
One thing that I thought was great about this lesson was the “Content” section where students were asked what they thought about a few of the podcast’s topics of discussion. It sounds like the students in Mr. White’s class enjoyed this part of the lesson & really took the opportunity to engage in discussion.
Overall, I think using podcasts in the classroom is a great idea. I’ve used Youtube videos, TED talks and other media, but never podcasts. Personally, I think that podcasts would work well for homework assignments, as well. I don’t generally like to assign homework to my students, but I think the option to listen to a podcast, make some notes and talk about it in class is an overall better use of time than many of the homework assignments I’ve seen.
I didn’t touch on this in the review, but Jason White also does a fantastic job of pointing out the logistics of using podcasts in class. How are you going to play it? Are your speakers loud enough? If you’re assigning the podcast as homework, do the students have internet access? Do they need to use a USB drive or similar technology to access the podcast? These are all questions that need to be answered in order to ensure a successful lesson.
So, in closing, I hope this (very) brief review has shed a little bit of light on using CALL in the classroom. I didn’t want to dive too deep into the subject since the review is meant to be fairly short. However, I did find some very interesting additional information about CALL here: https://www.cogentoa.com/article/10.1080/2331186X.2019.1580916.pdf
So, with that I’ll leave you with a short reference page & I’ll see you all back here for the next review.
Work(s) Cited
White, J. (2007, October). How to use podcasts for listening comprehension. Retrieved January 23, 2020, from https://www.tefl.net/elt/ideas/listen/podcasts/
Tavakoli, H., Reza, A., & Biria, R. (2019). Effects of CALL-mediated TBLT on motivation for L2 reading. Cogent Education, 1–21. Retrieved from https://www.cogentoa.com/article/10.1080/2331186X.2019.1580916.pdf

Running Ravenloft in Starfinder


In 2018 I had the idea to adapt the original I6 Ravenloft module for use in my ongoing Starfinder game. I’d previously ran the module in 2nd Edition AD&D as well as the D20 version: Expedition to Castle Ravenloft, though I updated that one for use in Pathfinder.
In order to update the module as seamlessly as possible while still maintaining that “Ravenloft” sense of dread & despair, I made heavy use of older materials such as Van Richten’s Guide to Vampires.
However, the text that I used most often was Expedition to Castle Ravenloft. I used it to set the pace of the game, map out the combat encounters, and reference characters and magic items.
Scaling the combat encounters was easy. I simply picked the creatures I thought were appropriate from the Alien Archive to replace the ones found in Expedition and the original text. For example, the zombies in Barovia were replaced by Cybernetic Zombies and Marooned Ones from the Alien Archives.
I used the 4th level Solarian template from the Starfinder Community Use packet for Ashlyn the Paladin. I also used the 4th level soldier template for Ireena Kolyana.
However, I did have to homebrew some items. Here’s what I came up with for the Sun Sword:
Sunsword:
Angel wing, monadic 7 5,500 2d6 E & F Burn 2d6 L Powered (capacity 20, usage 2), unwieldy p.10 armory
Weapon Fusions: Holy/Vampire Bane/
After completing 8 hours of prayer in the treasury:
Angel wing, monadic 7 5,500 2d6 E & F Burn 2d6 L Infinite Power +7 vs. Vampires
Weapon Fusions: Holy/Vampire Bane/Vorpal
Special ability: Able to cover a 90 ft circle in daylight once per day.
+4 to saves against spell effects cast by vampires.
Double Damage vs. Vampires (if critical x3 damage)

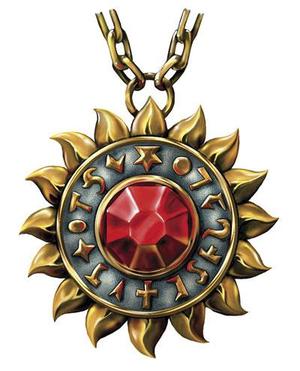
Here are my stats for the Holy Symbol of Ravenkind
Holy Symbol of Ravenkind: (After Bonding Ritual)
+8 to saves against spells/abilities cast by vampires.
Cast Mystic Cure as a level 3 spell 2x per day
As a standard action or reaction: Cast Halt Vampire (Hold Monster) at a +8 bonus to Spell DC. 3x per day. When you do this you summon bright, dazzling daylight in a 90ft circle centered on yourself. It lasts for the duration of the spell.
Cast Remove Affliction 2x per day.
Detect Vampires within 60 ft. Attacks bypass spell resistance/DR of vampires. (continuous)
These might seem a little overpowered, but when considering that the party was constantly being tailed by Emotovores & jiang-shi vampires, it didn’t seem that way in-game.
For Strahd, I used the Emotovore Mastermind. The party was between levels 8 & 9 so obviously they wouldn’t be able to take down a creature like that without some serious help.
However, my favorite parts about this game were the starship combats. I remade Barovia from a sleepy valley to an isolated star system. I’ve included a map for reference.
During one encounter, the group “piloted” giant space rollie-pollies into combat against several of Strahd’s patrol ships & our android was able to jetpack over and hijack a small fighter.
Mapping out the castle on Roll20 was a chore, but I bought a map set, which made it much less time-consuming.
Overall, I thought the game went exceptionally well & the players had a great time with it. In the future I’d like to adapt Ravenloft to other settings. I think next year I might try to run it in Basic Fantasy for a more old-school feel.
A Brief History of Trinigale
D&D Next Setting
Trinigale Downs
In past generations, the united townships of Trinigale Downs (three towns; Downs, Dawns, & Deeps) lived in peace, comfort and prosperity. Their fields grew plentiful wheat, which was used to make some of the most renowned breads and beers the world had ever seen. The mines of Trinigale Deeps produced a seemingly endless supply of ore, which was traded around the world, bringing extravagant wealth. The numerous cattle farms and wineries of Trinigale Dawns made food and wine plentiful for even the least fortunate.
But, such wealth and plenty was not to last. In the Mother’s Year 137; Year of the Sky, a coalition of experts and accountants petitioned the Mayors of each town (now small cities) to call a meeting of State. The Mayors obliged and a message was sent to many of the major and minor houses, most of which lorded over various assets of the land; such as farms, mines, and trade houses. The Lord Mayor was also petitioned to attend. Being a benevolent ruler, and also not wanting to seem unaware of problems within the realm, he hosted the event at the Alabaster Mansion; the center of commerce governance.
The news presented by the experts and accountants was not, at first, alarming. The mines were not producing as much ore, the fields were not re-growing as abundantly, cows and pigs were having less surviving offspring. Some thought the meeting to be a hoax or at the very least, a waste of time.
The Mayors and their advisers, though, were men and women of compassion, action, and skill. They took the new information back to their homes and began looking into potential causes. Their search, sadly, would yield profound results.
Six years later, in the Mother’s year 143; Year of the Omen, another Meeting of State was held. This time, each Lord Mayor had six years of data to share. House Llafidel of the Downs blamed the miners of the Deeps for “Terra-Firma sabotage”, stating that it was their use of mining technologies that lead to the reduction in crop yields. The miners of the Deeps blamed the farmers of the Downs, citing new information on field rotation. And the united houses of the Dawns mediated, wishing only to get production back to normal. But, as it soon became apparent, a return to the former prosperity of Trinigale Downs was not to be. The mines were almost out of ore, the fields had been planted season after season, year after year with no time to regain nutrients, and the people and animals that relied on those fields were growing increasingly weak.
The Mayors increased trade, bringing in foodstuffs and increasing tariffs. But eventually the money ran out and the once proud townships of Trinigale Downs fell into abject poverty. Merchants either sold their ships or sailed away to greener pastures. The people of the towns sought to alleviate the food shortage by fishing, constructing a massive fleet of ships. But, within a decade the waters around Trinigale had been fished out and the creatures of the forest hunted almost to extinction. Dark times awaited the people of Trinigale Downs.
******
Several hundred years have passed since then, and most of the former knowledge of past ages has been lost. Everything of value in Trinigale has long since been sold, consumed, or bartered away. Most fishing vessels were scrapped hundreds of years ago for housing lumber and firewood. Nearly every forest within reach has been cut down. Basic materials are difficult to come by, and Iron is almost impossible to find. People have lost their identities as citizens of Trinigale and formed a loose construction of haphazardly placed towns, most of which sprang up during one “rush” or another.
Your story begins here. Ever since you were children, you’ve asked “what’s outside the border?” Having long since burned the former nation’s books and maps for warmth, no one has been able to tell you. Growing increasingly frustrated with this constant lack of information, you’ve taken it upon yourself to find out. Over the course of several years, you’ve gotten enough information via research, folk lore, and even some minor travel to draw yourself a makeshift map of what would once have been Trinigale Downs.
Armed with this map and a great deal of hearsay, a group of friends have discovered that there may be a way to cross the northern mountains. For months you have prepared for what will surely be a difficult and dangerous journey. Over one final round of ale at the Fool’s Gold tavern in the northern town of Standingwater, you plan the final details before departing.
